Monday, April 23, 2007

Making Camp May

After four weeks of cold, rain, and even snow, we had our first decent weekend. Lizz and I took advantage of the nice weather to head up to West Virginia and set up camp. We have decided to call our place Camp May. The name comes from Lizz's middle name, but mainly just sounds nice.

We headed up as a two vehicle caravan: our vintage Toyota camper that we would leave for the summer and our new four wheel drive loaded with equipment. The old camper made it through the mountains just fine; the only real obstacle was the big hump to get from the private road onto our lot.


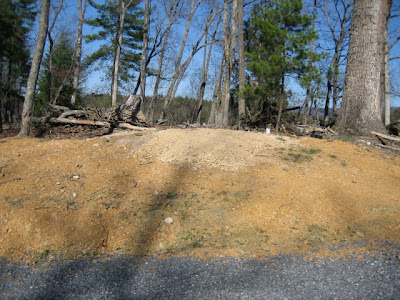
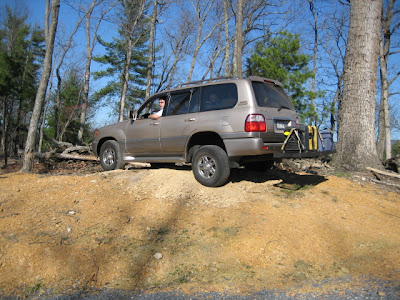
Here is a view of the hump looking from the road into the lot. There was a gravel pile on top that we smoothed out by hand, and some logs that we moved, but it was still pretty daunting. I do plan to rent some sort of land moving equipment to grade this entrance, but we were impatient to get started. I drove the camper up and over first. This maneuver involved gathering some courage, gunning the engine, and not stopping until it crested. This all happened too fast to get a picture. Which is a shame, since this was the first time I ever Lizz say, "I wish I owned a video camera."


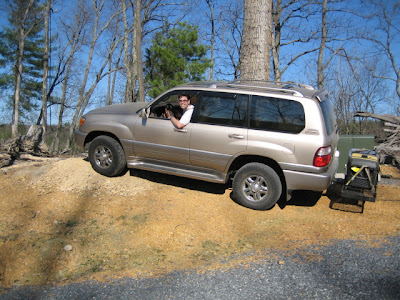
The four wheel drive negotiated the entrance without breaking a sweat. It made me confident enough to stop and pose for a picture. Here are some more snapshots Lizz took as I crested the hump and navigated the logging trail that runs along the ridge. I posted them to preempt the inevitable comments about our buying an obnoxious 5500lb SUV. At least I do fill it with stuff and drive it off road.


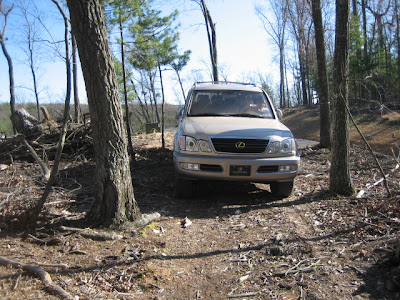
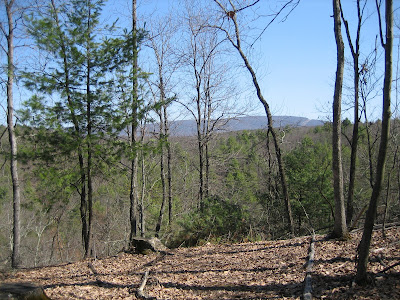
The logging trail already on the land makes for a decent camp road. We only had to move some logs and branches out of the way to make it back to the end of the ridge where we wanted to camp, about 400 feet from the road.


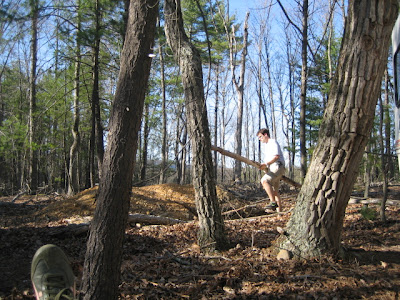
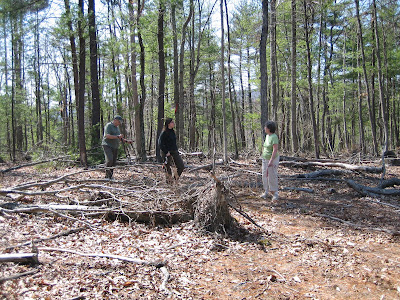
Lizz thought this picture would look impressive. These logs were cut a few years ago and are quite dry, so they only weigh 10% of what they look like. That is Lizz's foot in the shot. She lounges as I labor.


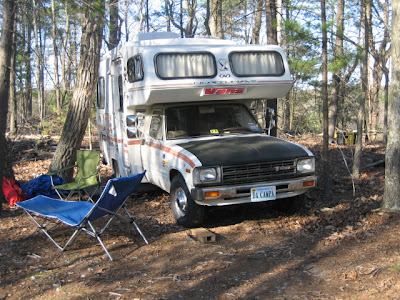
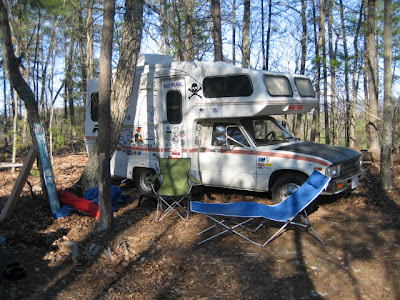
Here is our new weekend home. We will leave the camper here until fall.


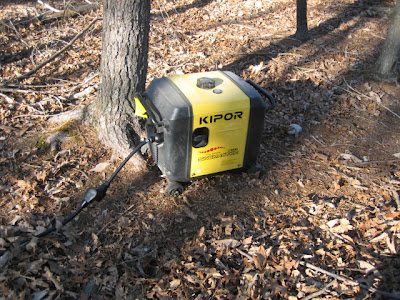
This generator is quite the nice piece of kit. It has a quiet four cycle engine, an insulated case, and an automatic throttle, which makes for a very quiet system. It proved very useful on its first weekend. We woke up Sunday morning to sub 40 degree temperatures, and it allowed us to run our electric heater and warm up the little camper. By noon, the temperature shot up to over 80 degrees. It is too early for any leaves on the trees, which made for a hot afternoon. The little generator easily ran our camper's air conditioner and cooled us down after a long hike in the woods.


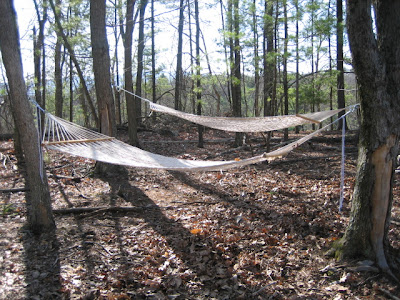
My last accomplishment of the first day was hanging our hammocks. A matched set means no fighting over this prime lounging spot.

Wednesday, April 11, 2007

Tour of the WV Compound

For the last weekend in March, we had some nice weather. Lizz and I and my parents took a day trip that Sunday to tour our West Virginia land for the first time since buying it. We got the land with the long term intention of building a weekend house but for the next few years we plan to use it for camping.


This is the view from the spot where we plan to build. It is also where we will probably park our camper van. Our lot is on a long ridge, and this the very end before a steep 200' drop off. The green ridge in the distance is North Mountain, which is the ridge that forms the west wall of the Shenandoah Valley.


This is looking back the other direction to the lot itself. Before the land was put up for sale, the entire development was opened up for logging. This meant a free 3 mile road to access these lots. Surprisingly, the loggers did not take many trees, and the lot is still well forested. As you can see there it a lot of detritus laying around that I will have to clean up. At least that means I get to buy a real chain saw. On this trip, we also figured out that the loggers beat a truck wide path from the private road back to our planned building site. This should give us adequate access for SUV, truck, and motorbike, and we can avoid paving a driveway for a while.


Here we are down at the river. There is a nice picnic area with a fire pit, and a good place to put a canoe in the river.


Lizz is enjoying the great weather and the lovely Cacapon River.


Here is when the dogs first discovered the river.


As usual, Sammy just waded in to cool off a bit. This was Benny's first time around water. He plunged in and swam around for real.


Sammy is breaking in to a nice run up the bank. Benny is still enjoying his swim.


And one more look at that view. I will post more pictures when we get our camp set up.

Wheel Puller

I needed to get new tires for my Ford pickup truck. I researched my options, and came up with a good set, some BF Goodrich all terrains, which are severe snow rated. Several hours after dropping off the truck at my local tire shop, I got a call from an exasperated mechanic. One of the wheels had seized to the hub. This wheel had been missing its hub cap for while, and had rusted on. Who knew hub caps had a purpose?

The shop had spent hours trying to remove the wheel to no avail. They soaked it in rust remover and suggested I take it home and give it some time to loosen up. Otherwise, they would have to take a torch to the wheel, likely destroying the wheel, and definitely requiring a rebuild of the bearings and brakes in that corner of the truck.

I spent the weekend trying various chemicals and mechanical approaches, with no luck. I researched the problem on the internet and did find a device for pulling seized wheels. Unfortunately, it cost $1400 and was sized for bus wheels. I then started designing a smaller scale puller that I could build my self with cheap, easily sourced materials.

My design closely modeled the commercial model. I needed a hollow cap to fit over the hub which would push against the hub and, ultimately, against the truck. I need an arm, chained to the wheel itself, that would pull the wheel away from the truck. Finally, I would need some way of moving the cap and arm apart, thus pulling the wheel off the truck. The patent application for the commercial puller upon which I based mine has some useful diagrams of the concept.

Here are the construction details for my wheel puller:

I constructed the puller out of a couple of lengths of angle steel, and one length of flat plate steel. These had the advantage of being cheap and available from the local home center.


Thanks to my dad, I have a drill press in my shop for making precise holes in the pieces. For this project, I had to drill holes as large as 3/4" to accommodate the long bolts at the heart of this machine.


Here is the cap that slips over the hub. It is constructed of four short lengths of angle steel, strapped together with four strips of flat steel.


I cut all this steel using my reciprocating saw fitted with the nicest metal cutting blade I could find. This worked great! Cut through this steel like butta.


Instead of a single large shaft to separate the cap from the arm, I decided on four parallel shafts which could be reasonably tightened with hand tools. In order to get rods thick enough and long enough, I bought a single 36" by 3/4" threaded steel rod. I cut this in to four equal lengths.


Here is the complete cap, on which I have mounted the four threaded rods.


The complete puller mounted to the wheel. Note that the arm is moved away from the cap by tightening the bolts on each rod. The arm is attached to the wheel with high strength chains.


After a bit of tightening, you could feel the tension in the air :-) After a while, there was a satisfying POP!, followed by cheering from Lizz. After a week of construction noise in the basement each night after work, the wheel was off on Saturday morning and had new tires that afternoon.